OAuth2
ARterra Labs API provides OAuth 2.0 compatible authentication workflow.
OAuth 2.0, is a standard designed to allow applications to access resources hosted by other web apps on behalf of a user. OAuth 2.0 provides consented access and restricts actions of what the client app can perform on resources on behalf of the user, without ever sharing the user's credentials.
info
Because ARterra Labs API follows RFC it is possible to use any compatible libraries for your programming language, e.g.:
ARterra Labs OAuth2 implementation includes these grant types:
authorization_code- The ARterra Labs API returns a single-use Authorization Code to the 3rd party application, which is then exchanged for an Access Token.
This is the best option for traditional web apps where the exchange can securely happen on the server side.password- This grant requires the 3rd party app first to acquire the user’s credentials, which are passed to the ARterra Labs server.
Because users may be afraid of providing their login info (ARterra Labs email/password) on your website domain it is advised to useauthorization_codegrant type with redirects to ARterra Labs login page.refresh_token- exchange of a Refresh Token for a new Access Token without asking a user to authenticate.
note
ARterra Labs API has no scope related restrictions so receiving access_token using OAuth2 flow means that
3rd party application gains full control and can perform any action this user has permission.
OAuth2 connect flow
caution
Before connecting 3rd party application to ARterra Labs API you must have created Business Partner and user with BP_ADMIN access.
How to configure Business Partner and assign BP_ADMIN user is described in Business Partner section

Authorize as BP_ADMIN user and create client credentials for your future application.
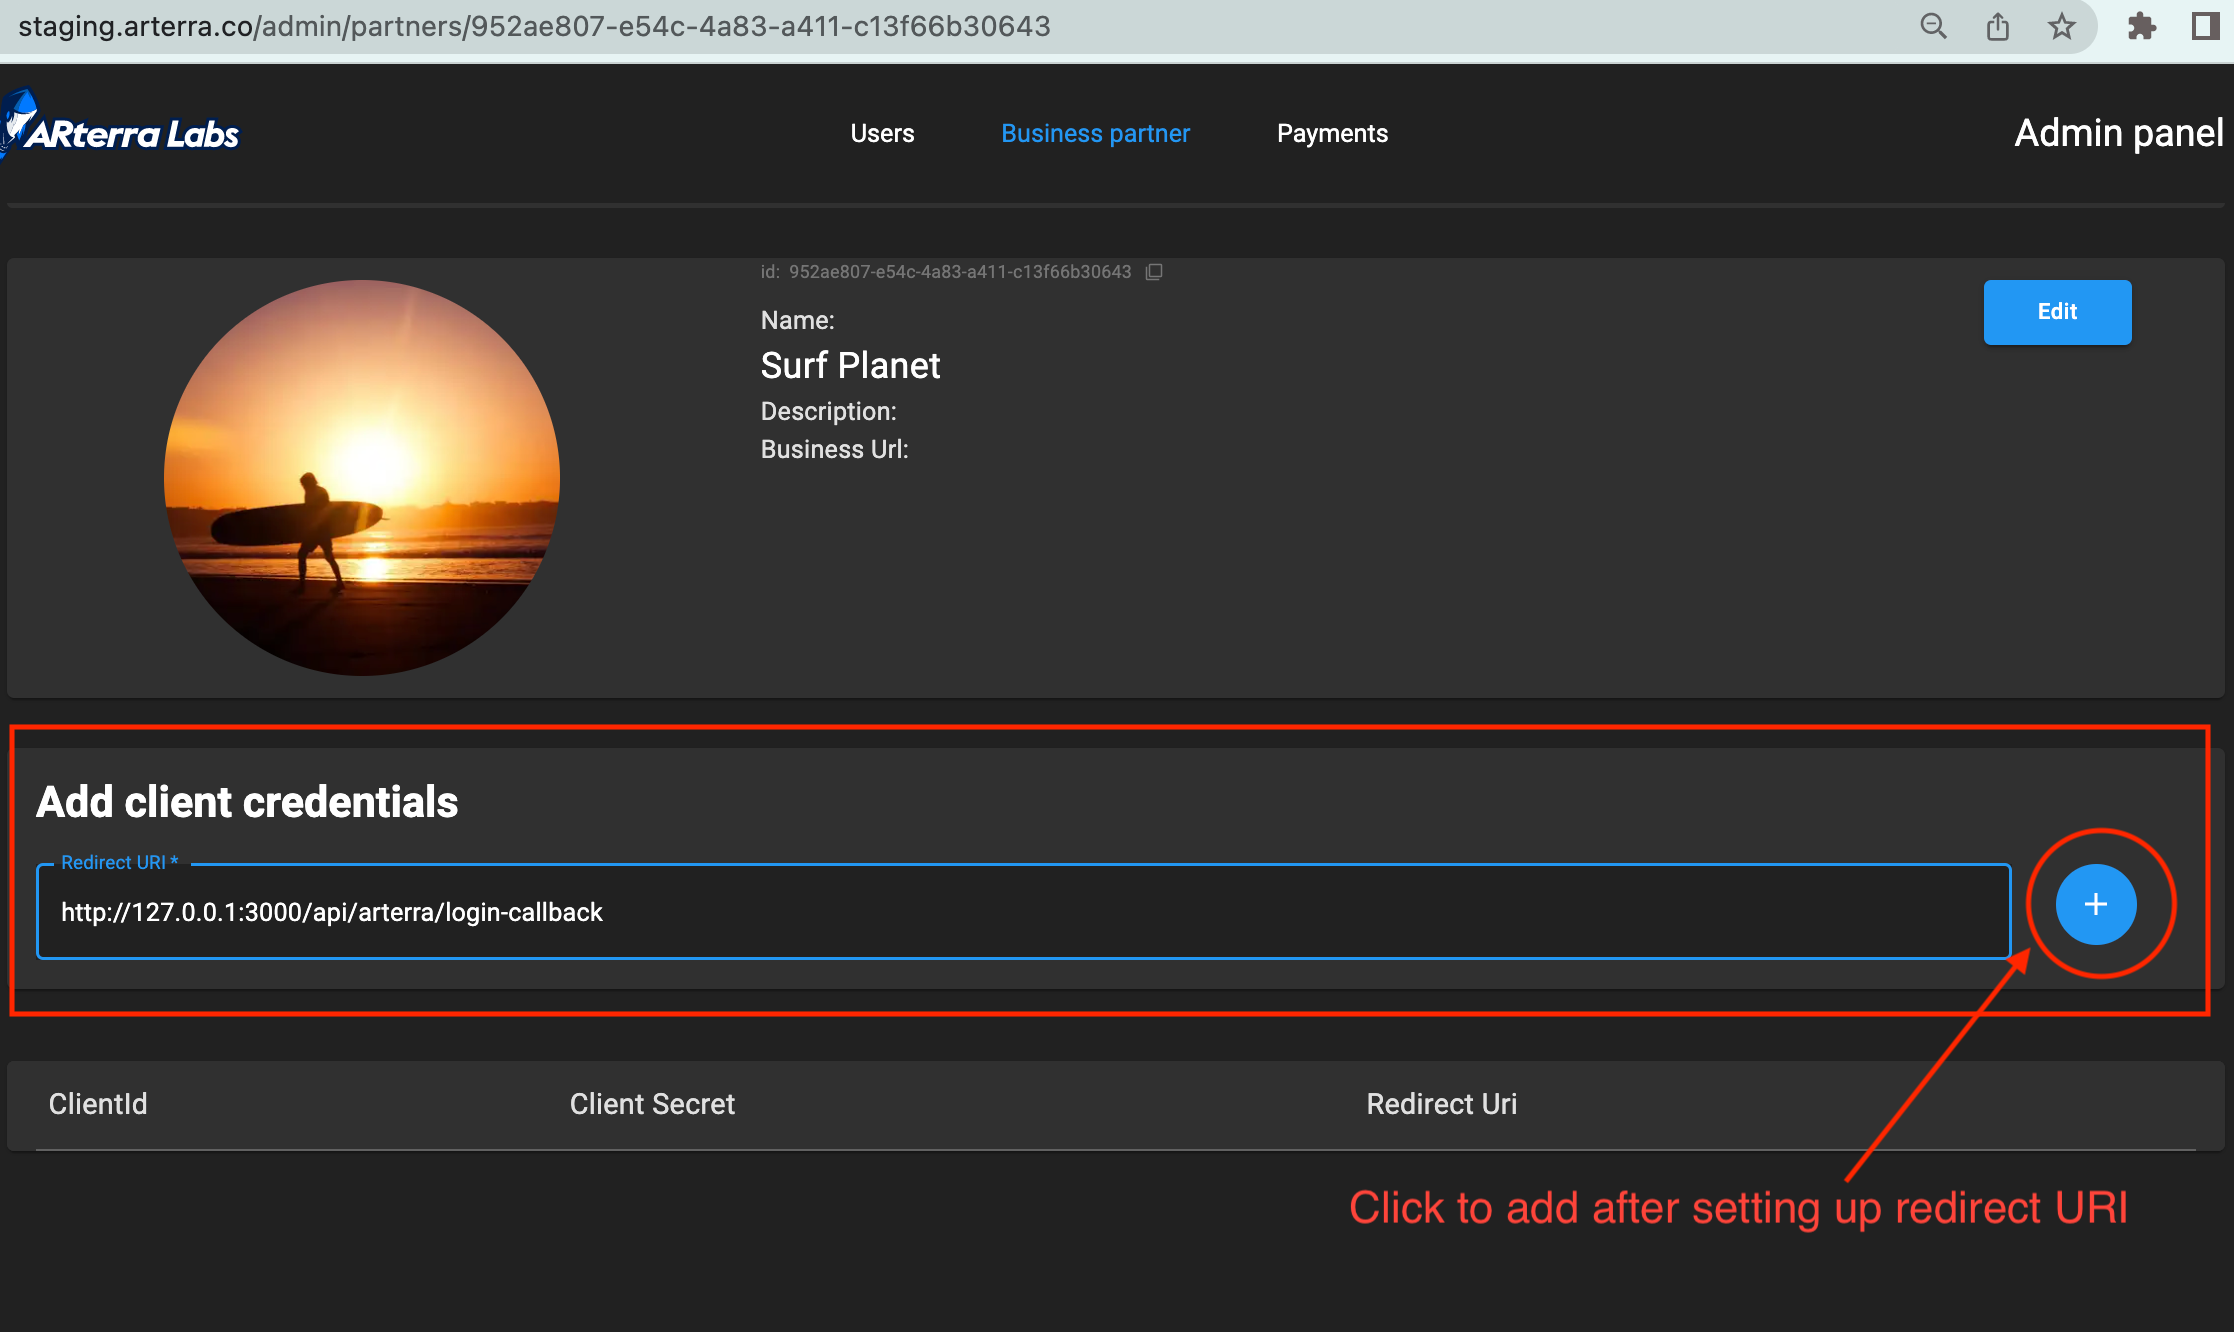
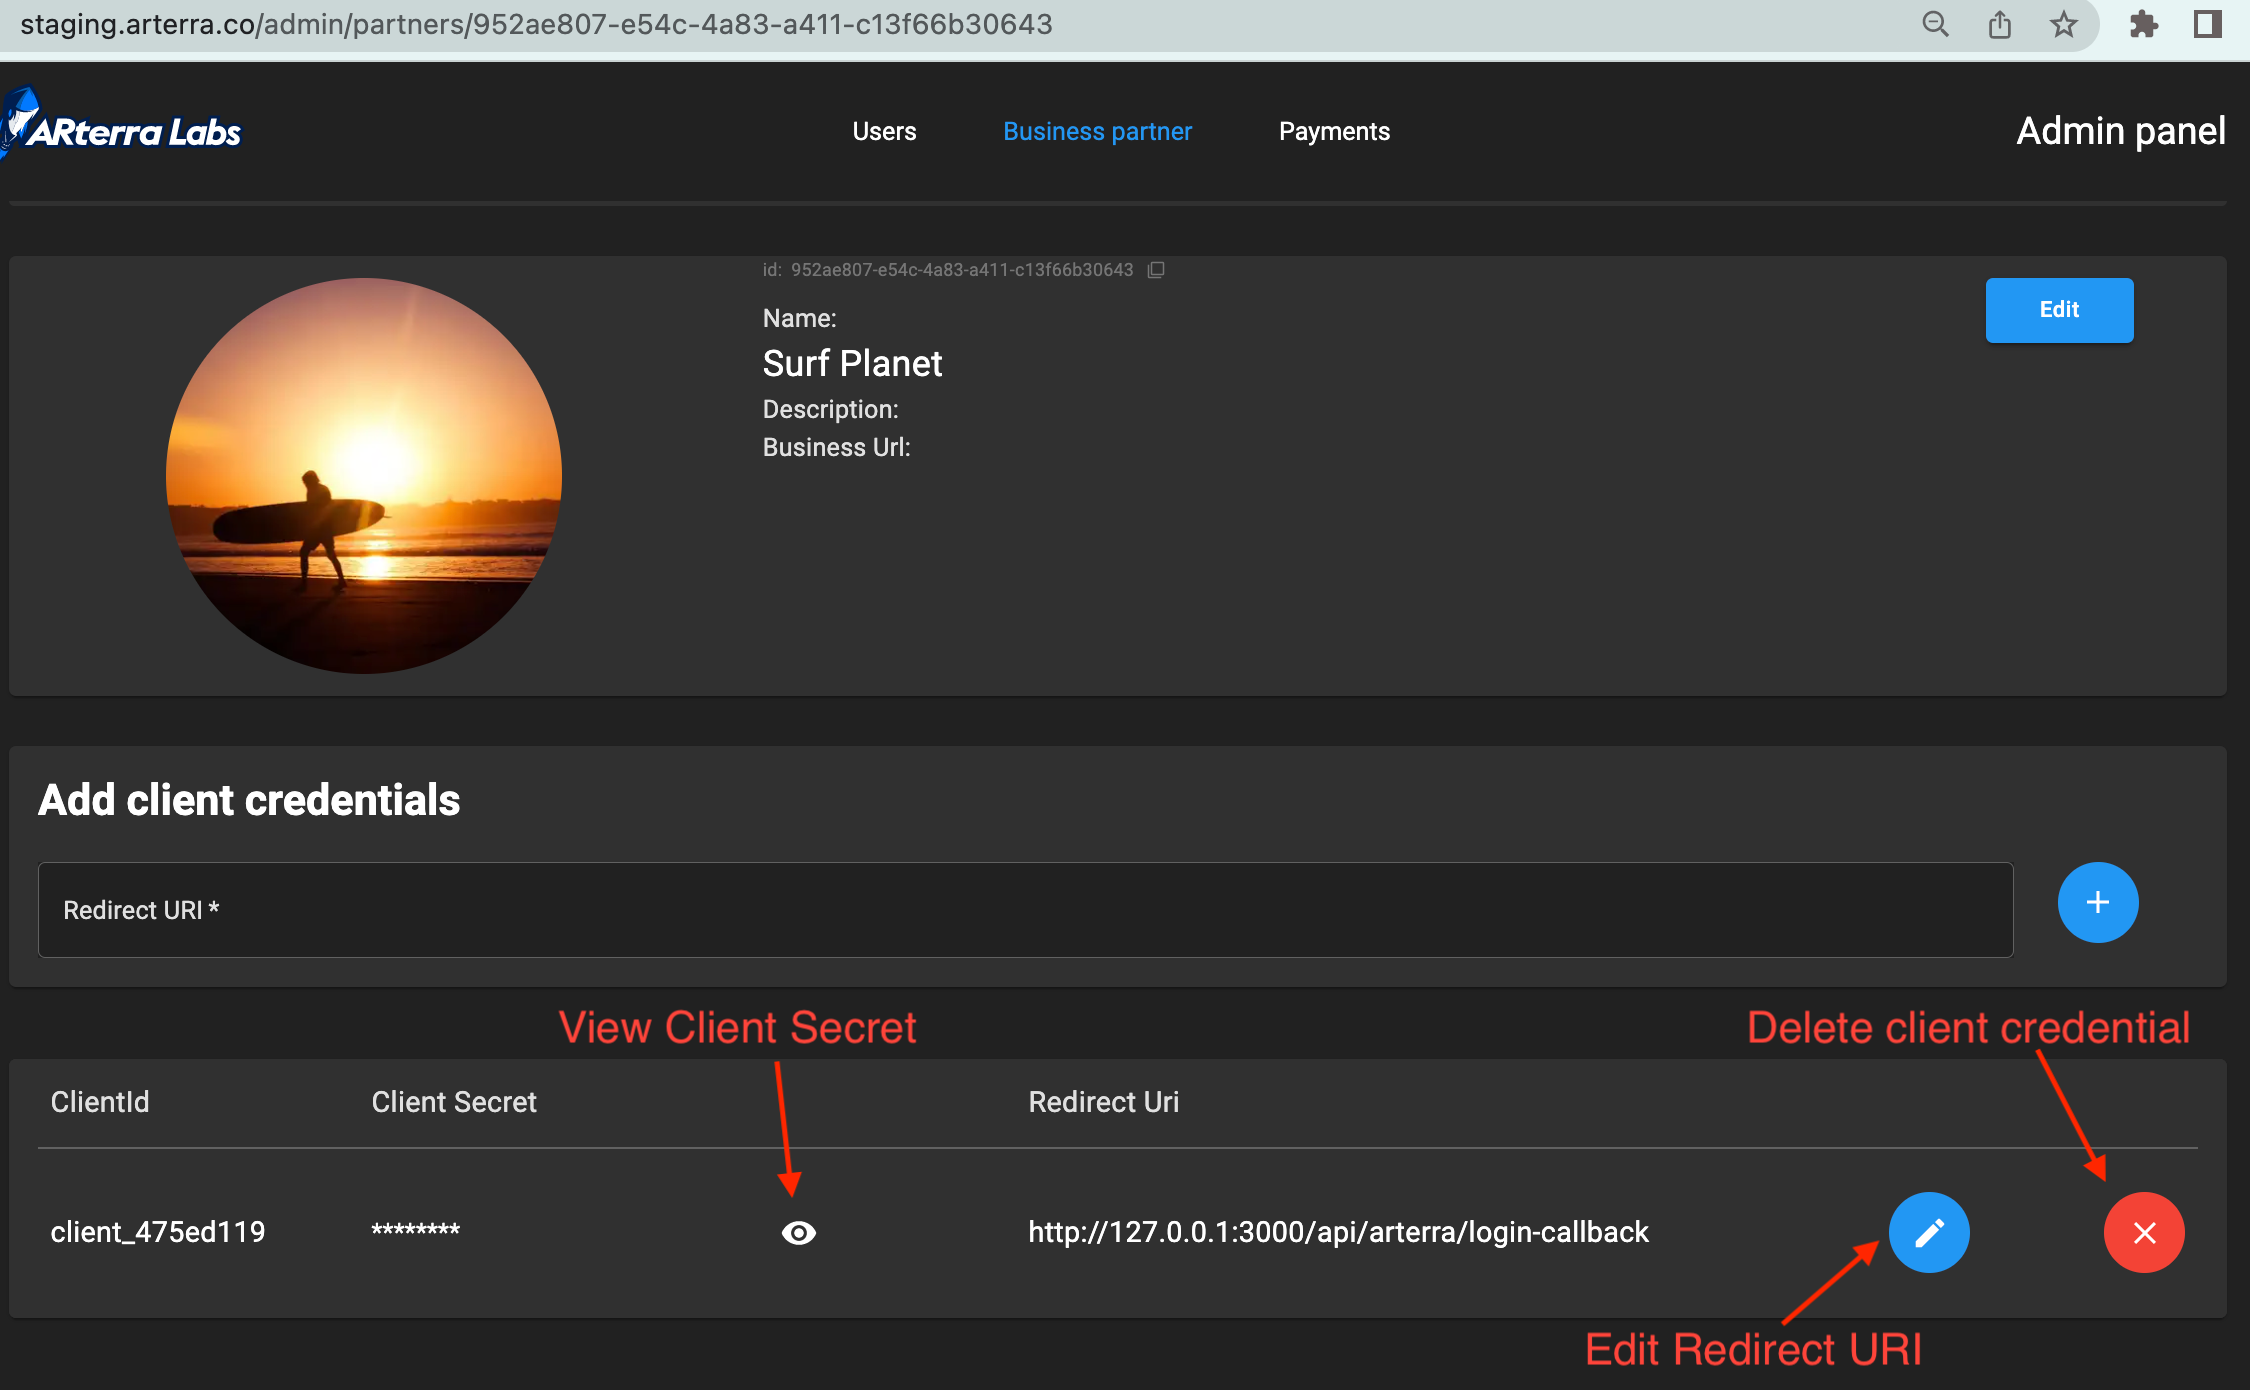
Client credentials for specified redirect URI should appear in the section below.
Client ID and Client Secret are generated automatically by the system.
Client Secret is visible only to BP_ADMIN user, even Platform ADMIN has no access to it.
You can create up to 8 different client credentials.
Now, when you have created client credentials, you can integrate your application (OAuth2 Client) with ARterra Labs API.
Further you can find instructions which will help you to guide your user through OAuth2 sign-in
or sign-up and example application with integrations.
OAuth2 Sign In (login)
This flow is described in details in RFC 6749 standard.
In general, you need to:
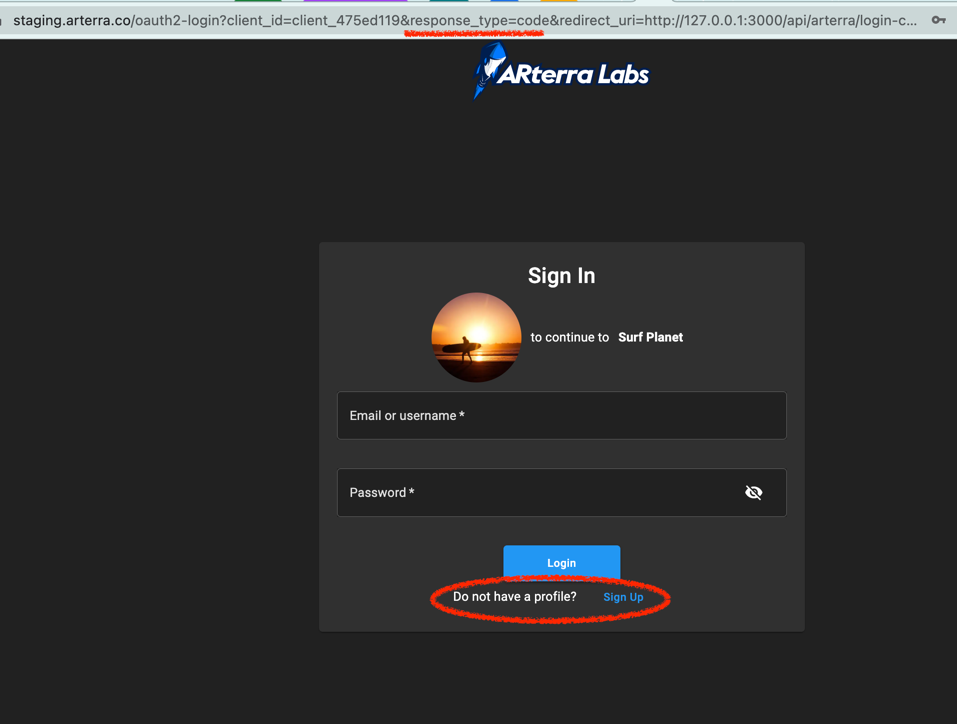
Redirect your User to ARterra Labs login page.
Sandbox ARterra Labs auth page for OAuth2 flow is https://staging.arterra.co/oauth2-login.
For live env - https://app.arterra.co/oauth2-login.note
If OAuth2 link is configured incorrectly user will be redirected to main ARterra Labs page.
According to RFC 6749 the OAuth2 link must have these query params:
client_id- required, your Client IDresponse_type- required, to open login page it should be equal tocoderedirect_uri- required, the Redirect URI to return your users back from ARterra Labs auth page.
The value must match your application URI registered in Client Credential section of Business Partner Admin page.state- optional, pass any value to transfer through auth flow, e.g. user id or some security token to verify authorization integrity
E.g. OAuth2 sign in link for the example application Surf Planet that was configured earlier in screenshots will look this way:
https://staging.arterra.co/oauth2-login?client_id=client_475ed119&response_type=code&redirect_uri=http://127.0.0.1:3000/api/arterra/login-callback&state=some-state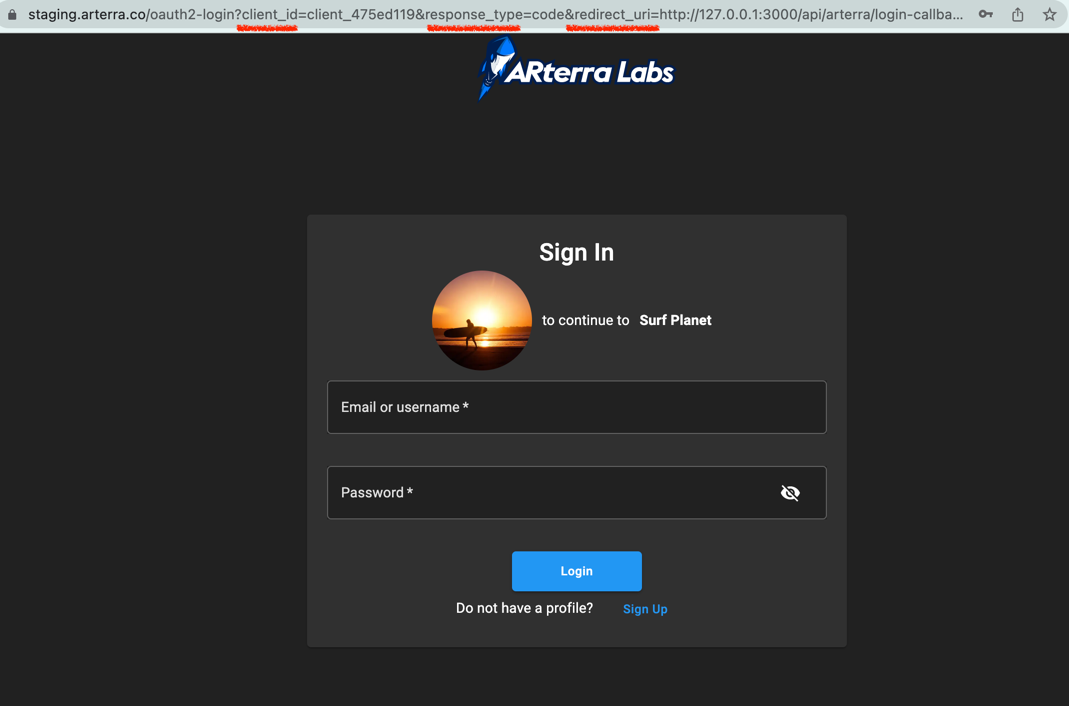
User signs-in.
The user provides his credentials and signs-in to the ARterra Labs Platform.
ARterra Labs redirects user back to redirect URI you provided with authorization code in query param.
After successful authentication user is redirected to your application link that you specified in the Redirect URI.
The link will have these query params:
code- required, the authorization code that you can exchange to access token.
This code is valid for one time use during 3 minute.state- optional, keeps value passed during redirect to ARterra Labs auth page
caution
It might be that user had no account on ARterra Labs Platform and just have created a new one. In that case redirect URI to your application will be different.
For details how to handle new ARterra Labs users check next sectionYour application exchanges authorization code to access token which you can use for further requests to ARterra Labs API on behalf of the user.
ARterra Labs API endpoint to receive access token: https://staging.arterra.co/api/api/#/auth/AuthController_issueAccessToken
It is important to passAuthorization: Basic Base64({CLIENT_ID}:{CLIENT_SECRET})header with Base64 encoded string of your Client ID and Client Secret.
For Surf Planet example application it isBuffer.from('client_475ed119:secret_a5ee033782be4636cbefc8').toString('base64')⇒Y2xpZW50XzQ3NWVkMTE5OnNlY3JldF9hNWVlMDMzNzgyYmU0NjM2Y2JlZmM4.
- Request
- Response
curl -X 'POST' 'https://staging.arterra.co/api/auth/oauth2-token' \
    -H 'Authorization: Basic Y2xpZW50XzQ3NWVkMTE5OnNlY3JldF9hNWVlMDMzNzgyYmU0NjM2Y2JlZmM4' \
    -H 'Content-Type: application/json' \
    -d '{
        "grant_type": "authorization_code",
        "code": "94c781f33491b6cff6dca9447d85ddb9292f8d366a6e95509e61896c4740e4fc"
    }'
{
    "access_token": "15b1043987d0edcc5f303e5ddbf2335976d495bb01e1732be3ccaa7937e36b9770568000a5c6cf3567f5ac5e4d012ebd01827080aacf0de2082566ee3fce8bda",
    "token_type": "bearer",
    "expires_in": 172800,
    "refresh_token": "5079fd9f6d979a7358b9bc84f74efe813f54d25ad90a39bfc7764acfe48456a33014318b7e3314cc384dbefae9a9ecd7a86f1f648a5f693ab0a477089d527f38",
    "refresh_token_expires_in": 604800,
    "profile": {
        "id": "33167f87-6192-435e-aa5b-3cab4b7465df",
        "username": "ykuznets66",
        "wallet": "ykuznets66.testnet",
        "role": "ADMIN",
        "avatarUrl": "https://s3.amazonaws.com/arterra-stage-avatar/user/a7cc76ec17b44c8e82474f4f9d32bb5175ef255eb8c392de2bf53c589b10f3af.webp",
        "fullName": "ADMIN",
        "bio": "",
        "businessPartnerId": null
    }
}
To refresh access token check refresh token section
Perform any action on behalf of the user using ARterra Labs API
With received access token you can perform requests to ARterra Labs API.
Access token should be passed inAuthorization: Bearer {ACCESS_TOKEN}header.E.g. to receive auth information and private user data call:
- Request
- Response
curl -X 'GET' 'https://staging.arterra.co/api/auth/info' \
    -H 'Authorization: Bearer 15b1043987d0edcc5f303e5ddbf2335976d495bb01e1732be3ccaa7937e36b9770568000a5c6cf3567f5ac5e4d012ebd01827080aacf0de2082566ee3fce8bda'
{
    "code": "SUCCESS",
    "data": {
        "accessToken": "15b1043987d0edcc5f303e5ddbf2335976d495bb01e1732be3ccaa7937e36b9770568000a5c6cf3567f5ac5e4d012ebd01827080aacf0de2082566ee3fce8bda",
        "accessTokenExpiresAt": "2022-06-18T05:02:45.142Z",
        "refreshToken": "5079fd9f6d979a7358b9bc84f74efe813f54d25ad90a39bfc7764acfe48456a33014318b7e3314cc384dbefae9a9ecd7a86f1f648a5f693ab0a477089d527f38",
        "refreshTokenExpiresAt": "2022-06-23T05:02:45.142Z",
        "client": {
            "id": "client_475ed119",
            "redirectUris": "http://127.0.0.1:3000/api/arterra/login-callback",
            "grants": ["password", "refresh_token", "authorization_code"],
            "accessTokenLifetime": 172800,
            "refreshTokenLifetime": 604800,
            "authorizationCodeLifetime": 180
        },
        "user": {
            "id": "33167f87-6192-435e-aa5b-3cab4b7465df",
            "createdAt": "2021-11-15T14:36:42.014Z",
            "updatedAt": "2022-06-14T08:12:41.865Z",
            "email": "[email protected]",
            "username": "ykuznets66",
            "wallet": "ykuznets66.testnet",
            "status": "ACTIVE",
            "role": "ADMIN",
            "isEmailVerified": true,
            "avatarUrl": "https://s3.amazonaws.com/arterra-stage-avatar/user/a7cc76ec17b44c8e82474f4f9d32bb5175ef255eb8c392de2bf53c589b10f3af.webp",
            "fullName": "ADMIN",
            "bio": "",
            "businessPartnerId": null,
            "stripeAccount": {
                "id": "acct_1K05p3QsRIUvGOcr",
                "userId": "33167f87-6192-435e-aa5b-3cab4b7465df",
                "status": "ACTIVE",
                "expiryDate": "1970-01-19T23:42:10.815Z",
                "createdAt": "2021-11-26T14:54:47.696Z",
                "updatedAt": "2022-06-14T08:13:54.808Z"
            }
        }
    }
}
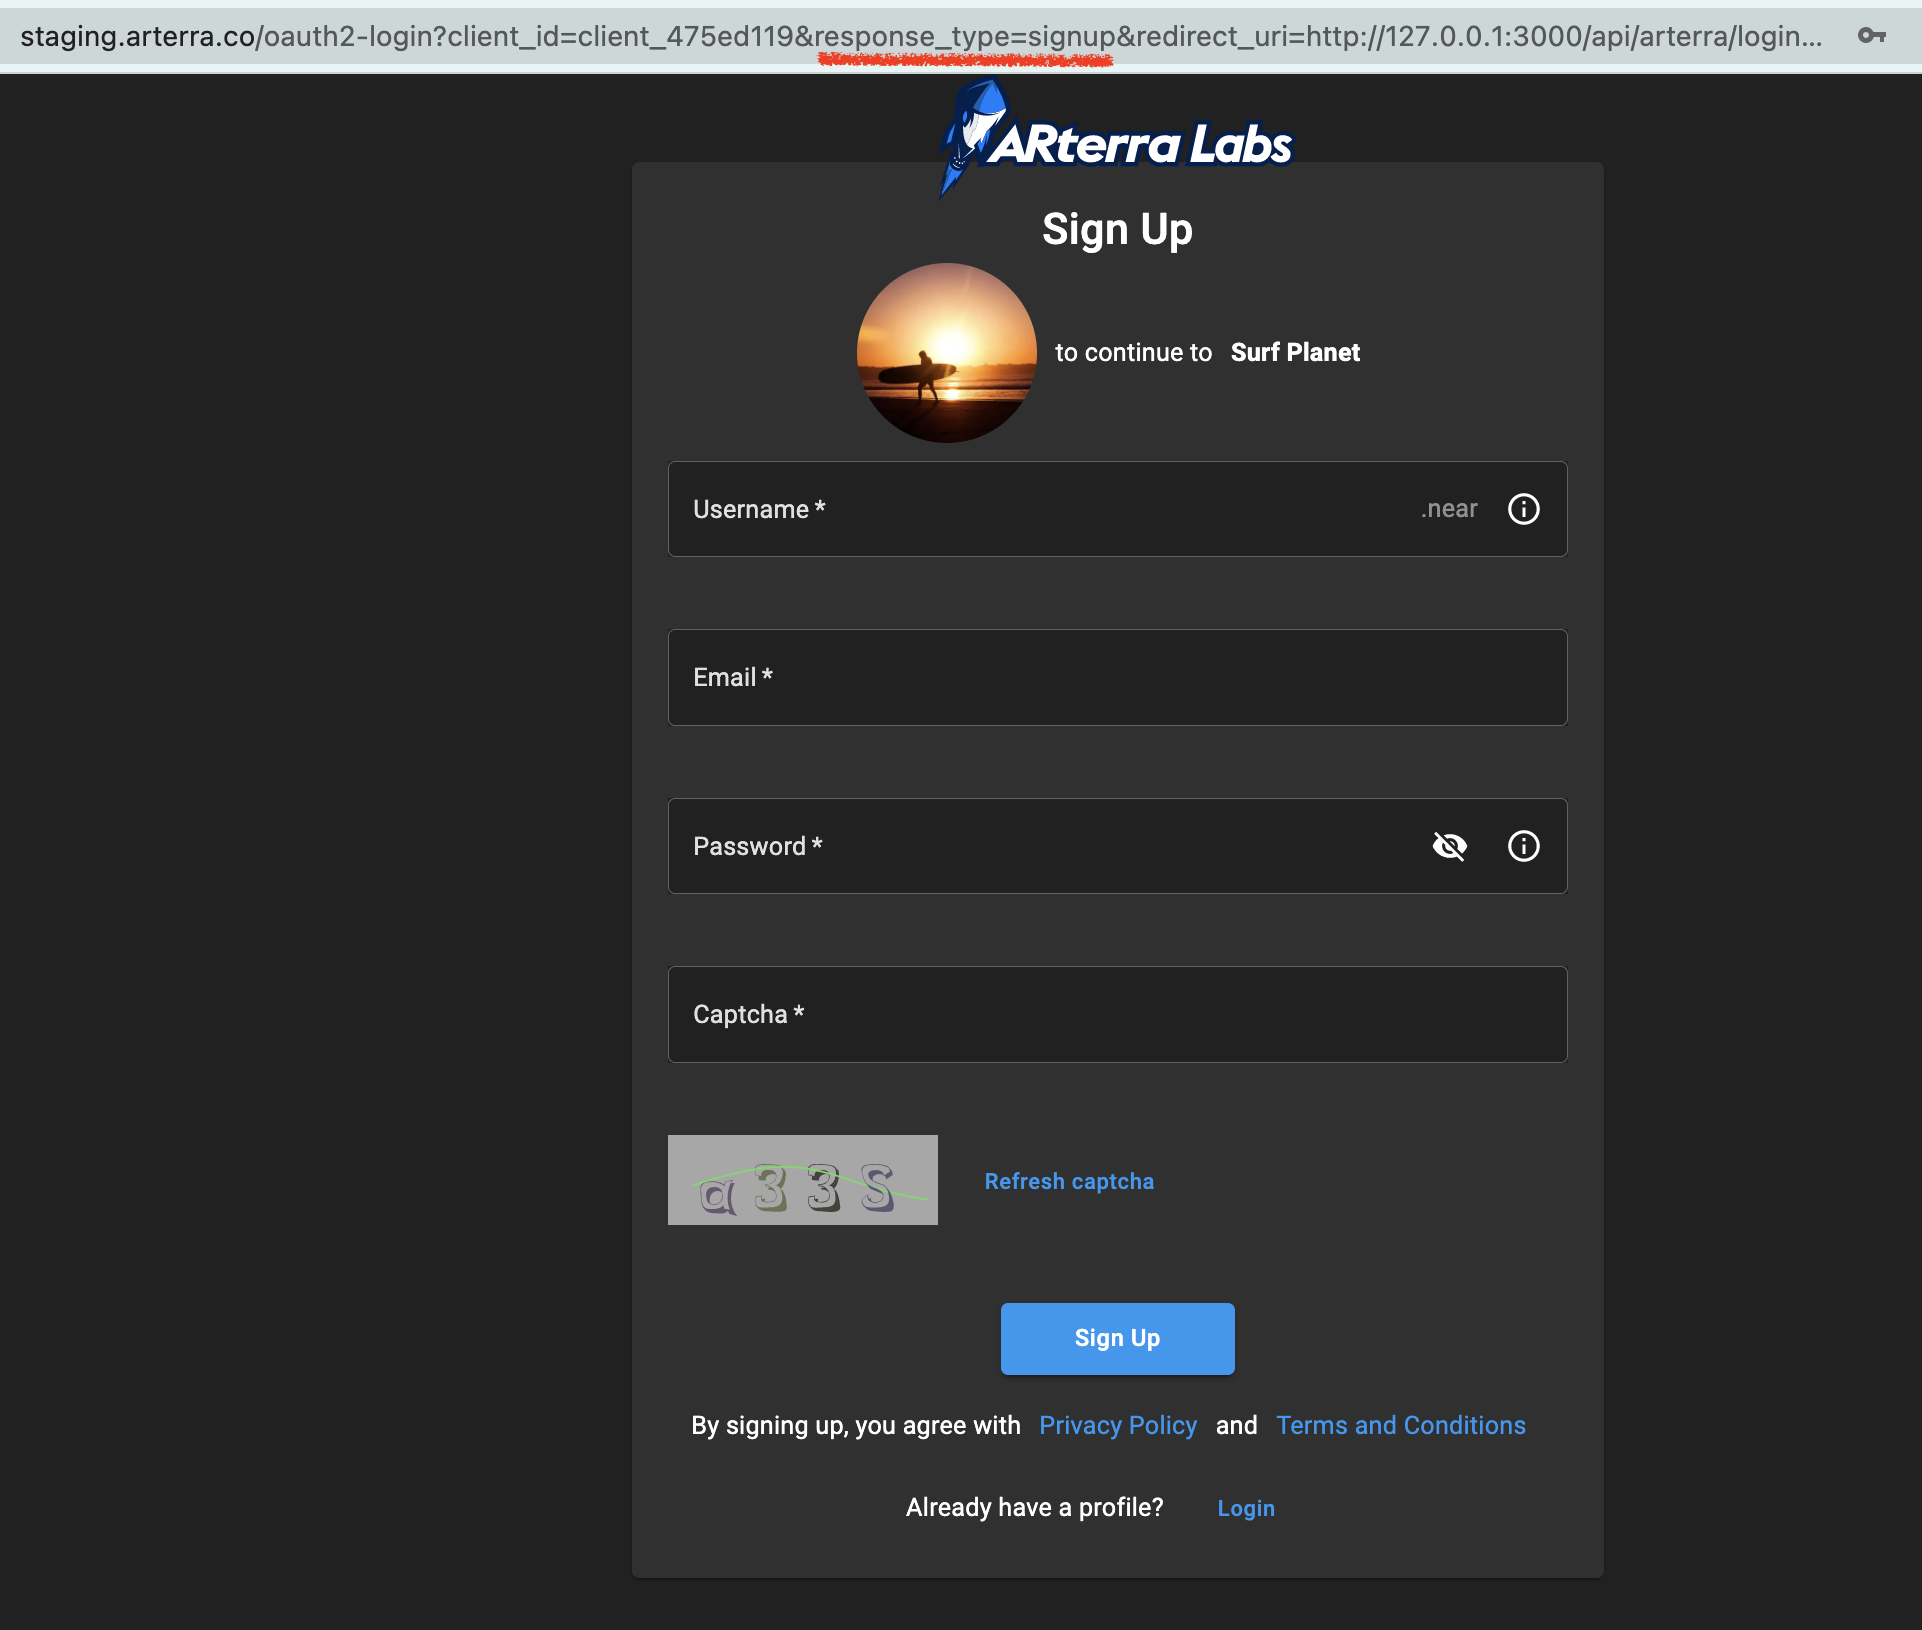
OAuth2 Sign Up (register)
To open sign up page for ARterra Labs OAuth2 we added unofficial query param response_type=signup
instead of response_type=code.
All other query params (client_id, redirect_uri, state) are left the same as for sign in flow.
So the OAuth2 sign up page for ARterra Labs will look like:
https://staging.arterra.co/oauth2-login?client_id=client_475ed119&response_type=signup&redirect_uri=http://127.0.0.1:3000/api/arterra/login-callback&state=some-state
tip
We still advise using standard OAuth2 response_type query param equal to code because in case User has no account
he can still click Sign Up button and proceed with registration.
Also, you will not need to keep track about existence of ARterra Labs account for your users.
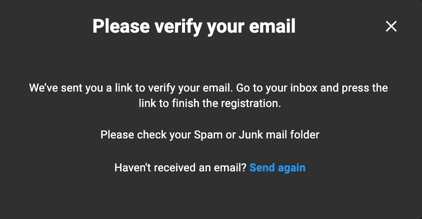
In case user had no ARterra Labs account and created a new one he can not sign in until his email got verified.
Then there will be no code query param in the redirect to your application.
When you receive userId query param that means that new ARterra Labs user was created
but he needs to check his mailbox and finish email verification.
For that case we recommend to show user a message to verify his email.
The link in his mailbox will also return him to your application from where he can retry sign in request.
Example application
We prepared several JS examples on how to integrate ARterra Labs OAuth2 flow to your application.
- API requests performed with axios without any auth libraries:
src/app-raw-axios-auth.js - passport with passport-oauth2 express middlewares:
src/app-passport-oauth2-auth.js
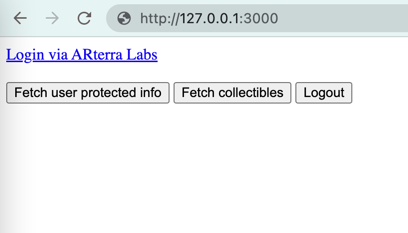
These examples will show you how to receive access_token and use it to fetch private user information and Collectibles.
# clone git repo
git clone https://github.com/ARterraCo/arterra-oauth2-connect-example.git
cd arterra-oauth2-connect-example

# install dependencies
npm install

# Start application
node src/app-raw-axios-auth.js
# or
npm start
Open http://127.0.0.1:3000 to test in browser.
Optionally, you can provide your own Business Partner client credentials:
vi src/config.js
For detailed information how to configure example application check project README file.
Refresh access token
ARterra Labs API endpoint to refresh access token is the same as for receiving access token:
https://staging.arterra.co/api/api/#/auth/AuthController_issueAccessToken.
The difference between issuing new access token and refreshing is in grant_type.
You still must pass Authorization: Basic Base64({CLIENT_ID}:{CLIENT_SECRET}) header.
- Request
- Response
curl -X 'POST' 'https://staging.arterra.co/api/auth/oauth2-token' \
    -H 'Authorization: Basic Y2xpZW50XzQ3NWVkMTE5OnNlY3JldF9hNWVlMDMzNzgyYmU0NjM2Y2JlZmM4' \
    -H 'Content-Type: application/json' \
    -d '{
        "grant_type": "refresh_token",
        "refresh_token": "5079fd9f6d979a7358b9bc84f74efe813f54d25ad90a39bfc7764acfe48456a33014318b7e3314cc384dbefae9a9ecd7a86f1f648a5f693ab0a477089d527f38"
    }'
{
  "access_token": "d2740fe47603f4ae6472130625edbc677eab5785ff04429b7448a4a9ef250dad337d8b16d0c1309ec19a9151744555bace286eeb44d1780b7c81847efdba9cac",
  "token_type": "bearer",
  "expires_in": 172800,
  "refresh_token": "08b9965a5c0c404454f58e3287d37ae13b90cabf6e4aa225f6cb2f6ec691a5aaf361055dc21f7ac1148dbb4475b41559b88be4532dad87b1fcc7c7ad553cd1c5",
  "refresh_token_expires_in": 604800,
  "profile": {
    "id": "33167f87-6192-435e-aa5b-3cab4b7465df",
    "username": "ykuznets66",
    "wallet": "ykuznets66.testnet",
    "role": "ADMIN",
    "avatarUrl": "https://s3.amazonaws.com/arterra-stage-avatar/user/a7cc76ec17b44c8e82474f4f9d32bb5175ef255eb8c392de2bf53c589b10f3af.webp",
    "fullName": "ADMIN",
    "bio": "",
    "businessPartnerId": null
  }
}